Friday, June 10, 2011

My Big Project: Raised Vegetable Beds

For quite awhile, I’ve had this idea in my head to do raised beds for my veggie garden. I’ve had a vegetable garden ever since our first spring in this house in 2006. It started in some small raised beds that were built by a previous owner. They were old and didn’t last long. Then I dug out more space along the back of the yard to grow more veggies. It started with tomatoes and squash, and through the years I even tried my hand at potatoes and corn, athough not very successfully.

As mentioned in my “Fence Farce” post, last year the neighbor behind us had said he was going to put up a fence, so we had paid his friend to clear out our old, overgrown hedge. This allowed more room for the vegetable garden and sparked the idea that now was time to plan my formal “kitchen garden.” The fence still isn’t there, but my new kitchen garden is!

I spent a lot of time researching in books and online, drawing on scraps of paper, measuring, and finally drawing some designs on graph paper. Normally I’m not much of a planner when it comes to my garden, but knowing I wanted a formal look I thought I should have the “big picture” of what I wanted to do. You wouldn’t know it looking at my flower garden, but I love formal garden bed design. Let things spill over the edge, but start with a formal plan. I’ve always particularly admired French potagers and formal English kitchen gardens. The most fantastic kitchen garden in America is Thomas Jefferson’s kitchen garden at Monticello in Virginia. It’s massive and gorgeous — beyond what I can do. It’s a true inspiration.

So once I had a design plan I liked, I started to clear out more room in the very back of the yard, digging up sod and all of that. I decided on a basic cedar raised bed design that I got from Sunset’s website: http://www.sunset.com/garden/perfect-raised-bed-00400000039550/ (I followed it pretty closely, except for financial reasons we used 1' x 6' instead of 2' x 6' cedar boards and metal brackets for the inside corner reinforcements.) When I realized I had to do math, I pulled Brian in on my scheme. He helped me figure how much wood, soil and gravel I would need.

The space where the kitchen garden would go, looking from left back corner to right back corner.
Back left corner of the yard that my older sister helped me clear out.
Still gotta get that tree stump out of there.
We built the frames for the beds last October. There’s one 4' x 8' bed, four 3' x 6' beds, and two u-shaped beds. Originally I wanted either four L-shaped or triangular-shaped beds, but they wouldn’t quite fit. So they ended up being two u-shaped ones. I added compost from my compost bin, but that’s as far as I got before it got too cold.

Some supplies: Cedar planks and PVC pipes.
(I know you’re enjoying that view of our neighbor’s lovely car as much as I am.)
All of the raised beds except the other u-shaped one.
This was taken before I leveled off the ground. Fun job.
Early in the spring I got soil delivered. It’s a mix of screened topsoil and leaf compost. I added more of my own compost and Bumper Crop (an organic soil amendment with Mycorrhizae, Worm Castings, Kelp Meal and Dehydrated Poultry Manure – mmmmm, good stuff).

I never had any luck growing from seed in my garden, probably due to the many birds we have living in our birdhouses. So with the new beds, I used a lightweight row cover to start seeds outside. It worked like a charm. I actually was able to grow leafy greens for the first time since we moved into this house. In fact, I think I went a little overboard with the lettuce and romaine. We’ve been eating lots of salads.

In mid-April I planted seeds and put up the row covers. I also started the gravel paths.
Seeds didn’t do so well in the u-shaped beds because they weren't covered.
I used plants here instead.
In early May I still had the row covers on and had done more of the gravel paths.
Later in May I removed the row covers and viola!
I am still working on my gravel paths. It’s been quite a chore digging out sod and weeds, putting down edging and landscape fabric, and hauling the 3/8" Delaware River Stone from the driveway in my front yard to the very back of my back yard. The soil was difficult enough, but gravel is heavier!

So this is where things are at now: It’s all done except for the “entrance” path and the back left corner where I still have a tree stump. We’re thinking a small garden shed might go in that area eventually anyway. It’s been awesome walking to the back of the yard picking fresh greens, herbs and vegetables. I have more herbs right outside the back door and it probably would’ve been better to have the veggie bed there, too. But the best sun is along the back of the yard.

Standing in back left corner looking to the right.
Standing in back right corner looking towards left.
I don’t think I quite realized the scope of what I was getting myself into when I first drew up the plans for my vegetable beds. Overall, with walking paths included, the kitchen garden is about 15' wide x 50' long. However despite all the hard work, it’s looking really great and we’re enjoying the bounty of my labors. I’m thinking it was worth it.

Rainbow swiss chard.
Broccoli and pickle cucumbers (petunias on left, nasturtiums on right).
Now if I could just get Mr. Loud-Talking Friendly Neighbor to put up that fence he’s been promising to do for over a year now. It will make the vegetable garden look SO much better. (Update: He has the fencing, but no posts yet. Too bad it’s an ugly white vinyl fence. Wanna place bets on how long it will take to get the posts and actually put up the fence? I’m guessing another year.)

Zucchini, squash, and eggplant.
Carrots (and some weeds).
Beets.
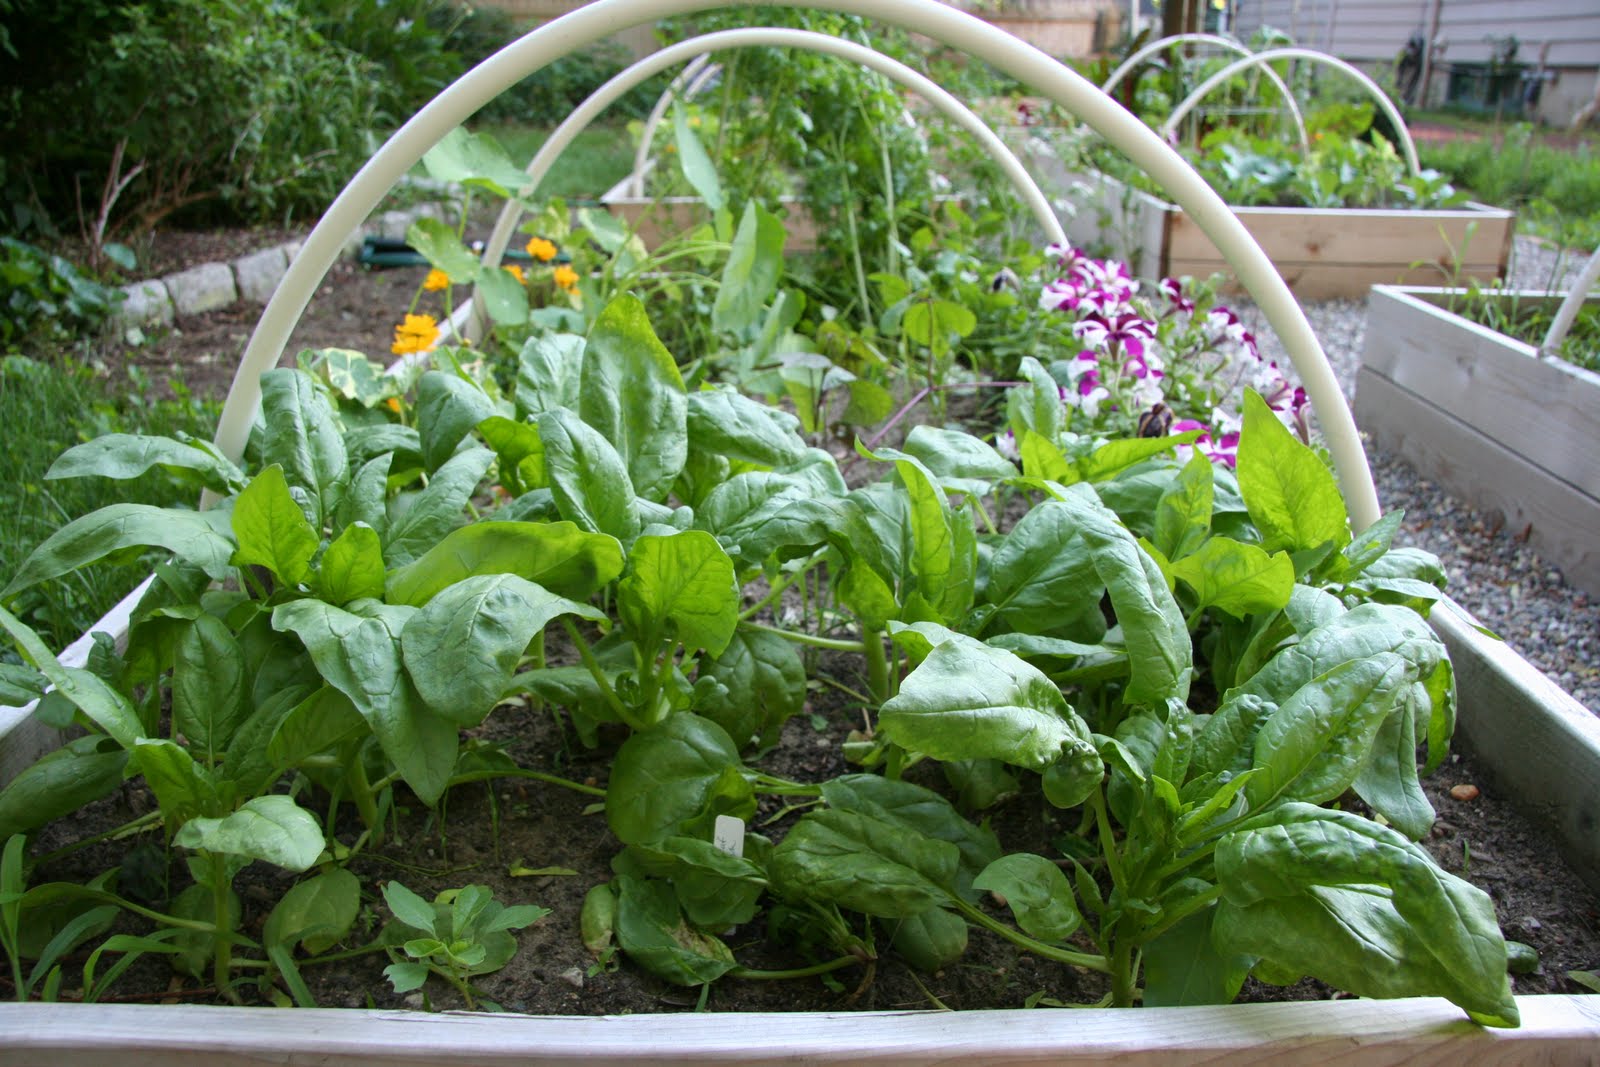
Spinach.
Romaine and Buttercrunch lettuce.
Toy Bok Choi.

Saturday, June 4, 2011

The Merry Month of May – gone but not forgotten

I am behind in posting some pictures of my flower garden from May. May is when things really start to come alive in my garden. In the words of poet John Milton, “The flowery May, who from her green lap throws / The yellow Cowslip, and the pale Primrose...” It’s a wonderful month, with cool spring breezes, that makes you want to work in the garden.

May is when the purple Columbine are at their best. They love to re-seed and pop up in different places each year.

Columbine close-up.
Columbine and my garden statue (we named her Winnie).
(Pretend you don’t see the neighbor’s play-set in the background.)

It is also when the Peonies show their pretty faces. These white ones are actually in my front yard (mixed in with the Azaleas).

We had a lot of rain after this picture was taken.
Unfortunately, the rain spoiled the rest of the buds.
I love the little reddish bits in the white peonies.
The bright magenta Peonies are in the back of my flower garden. This plant used to be in the front yard with the white ones, but seemed like the odd man out, so I moved it to the back yard. It struggled for a couple of years, but looks really healthy now.

Taken from the back of the flower garden, looking towards our shed.
(That’s the neighbor’s big house in the background.)
Other flowers that bloom in May are the climbing Hydrangea and climbing rose on the arbor, some other roses, white Dianthus, the purple spikes of the Catmint, both purple and magenta Clematis, purple Siberian Iris, purple Spiderwort, pink Weigela, purple Bellflowers, and some white flowering shrub (I’ve been trying to figure out what it is). May is a profusion of mostly pinks and purples in my flower garden, with a bit of white and yellow mixed in.

View of the flower garden from the steps of my back porch.
The arbor with climbing Hydrangea, pink climbing roses and purple Clematis.
That’s white Dianthus on the bottom right.
Fine Wine Weigela with roses and Catmint in the background.
Purple Bellflowers.
Purple Spiderwort, Catmint and pink roses.
Siberian Iris and light pink Abraham Darby roses. Yellow roses in background.
I had to include a picture of the Smoke Bush that I planted last year.
I love the changing colors of the leaves as the sun hits them.

Saturday, May 28, 2011

Summer Rain

One of my favorite smells is the rain in summer. It’s Memorial Day weekend, the start of summer, and sure enough it rained. It was a brief, passing shower that came out of nowhere. I was weeding and pruning when suddenly the sky turned dark. I thought, “Hmm, it smells like rain.” Then the wind kicked up and there it was – a downpour. I sought shelter on my screened-in back porch, where my kittens were lazily napping. I poured a glass of wine and enjoyed the fragrance and sound of the rain. The sun popped out and it became a sun shower. It doesn’t get any better than that.

Whenever it rains in summer like that, I think of the Johnny Rivers song, “Summer Rain.” The tune goes through my head, “Summer rain taps at my window / West wind soft as a sweet dream / My love warm as the sunshine / Sittin’ here by me, she’s here by me…” Johnny Rivers is probably more well-known for “Secret Agent Man,” but “Summer Rain” is a favorite of mine. 

Raindrops in motion. (Picture taken through the screen on my back porch.)

Not long after it started, the rain was gone. And I had to turn on the sprinkler to finish watering the garden. It was a fleeting, happy moment. 


If you want to hear “Summer Rain,” go here to see a taping of a live performance from 1973 (with the mustache, wavy long hair, and all the glamour of the 70s): http://www.youtube.com/watch?v=MLZt8rEfsF4

Monday, May 23, 2011

Pass the Wine, Please

No, I’m not talking about a bottle of Côtes du Rhône or Pinot Grigio — although I certainly wouldn’t turn those down. I’m talking about an Iris. I’ve always liked bearded iris, so it’s interesting that I only have one in my garden and I just planted it the year before last. They are graceful flowers that come in so many great colors. I had a hard time deciding what kind I wanted in my garden. I finally decided on “Pass the Wine” due to it’s dark maroon colors. Or so I thought. That’s what the picture in the catalog looked like, but that’s not what I got. Being a graphic designer, I should know that what you see isn’t always what you get when it comes to color. We are often telling customers that their hard-copy proofs or their PDF proofs won’t match their printed piece exactly. I guess it can sometimes be the same with a picture in a garden catalog and the actual flowers! I looked it up on www.davegarden.com (which is a useful website, albeit not very well-designed) and checked out the pictures posted by other people — and gosh darnit, they look just like mine. I wonder if those people were as disappointed as I was. Don’t get me wrong, it’s beautiful with lovely colors. Just not what I expected. So take a look at the so-called wine-colored flowers of “Pass the Wine.” It really is pretty, despite it not being what I thought I would be.


If you want to see what I was expecting, go here:
http://www.dutchbulbs.com/store/iris/14425

Thursday, May 19, 2011

In Appreciation of Azaleas

I must admit, I’ve never really been a great admirer of azaleas. It wasn’t until I went to Winterthur in Delaware one Mother’s Day that I realized how beautiful they could be. Winterthur is an amazing place and if you’ve never been there, you MUST go. It was the house of Henry Francis du Pont. Not only are there 175 rooms filled with antique American furniture, there’s a wonderful 60-acre naturally landscaped garden. I will have to do a post on Winterthur sometime with pictures. But I digress... Winterthur has a truly magnificent azalea garden. Around Mother’s Day it’s a mass of glorious colors. After seeing that I thought, “Hmm, maybe there is something to this azalea thing after all.” Mind you, I’m not ready to run out and join the Azalea Society of America (yes, there is one), but I’ve decided azaleas do have a place in the landscape.

When Brian and I first bought this house in 2005, I spent the first year just observing the grounds – not planting much, but just seeing what was already there and what it did when. There were azaleas in the front yard and I wasn’t sure I’d keep them until I saw them bloom that first spring in 2006. They light up the front yard in white and magenta. I decided I kinda liked them there.

Azaleas in the front yard.

The front yard is an area I haven’t done much with and that’s in large part due to those azaleas. It’s also due to the fact that there’s some serious tree roots and it makes for difficult digging. The only thing I’ve planted is a hydrangea and another azalea to replace a large, dead azalea. I know I’ll eventually do more, but I’ve got my hands full with the back yard and for now I’m content with the azaleas in the front.

Close-up of the azaleas in the front yard.

There are also two azaleas in the back yard by our shed / workshop. They bring color to an otherwise fairly dark area. 

Pink azalea by the shed as it’s starting to bloom.
(That’s a neighbor’s blue house in background. No, not Mr. Friendly Loud-Talking Neighbor.)

Yes, it’s true, the azaleas are done and not blooming right now. But I couldn’t resist showing some pictures.

Magenta and pink azaleas in front of the shed / workshop. Also some clematis in this shot.
(No, we don’t keep Christmas lights up all year round. Well actually we kinda do.
We like the white lights all year round on the shed and in the greenhouse.
They happen to be falling down a bit in spots, though. Guess we better get on that!)

Monday, May 16, 2011

The Fence Farce

I want to post some pictures of my latest big garden project that I've been working on since last fall, my raised vegetable beds. However, before I do so, I need to premise it with the story of what I refer to as “the fence farce” or “the invisible fence.”

We are very close to our neighbors on three sides. The neighbor along the back is a rental property, however the landlord shows up pretty much every weekend to do whatever it is he does in their large garage. Our property and his were divided by an overgrown hedge of invasive honeysuckle and who knows what else. It was pretty messy and not very attractive, but at least it was a green visual barrier from my neighbor’s parking lot of a driveway that includes various vehicles that don’t work anymore (a broken down boat, wave-runner, and at least two or three other cars).

My view of the back of my yard and the neighbor's property when there was still a hedge.
The hedge is behind the curved garden bed and the small raised bed (that has since fallen apart).
The large, white structure is the neighbor's garage.

Early last spring, my loud-talking, friendly neighbor says, “Hey neighbor! We’re planning on putting up a fence next week. I have a friend who can take down that hedge for you really cheap if you want.” Little did he know that Brian and I had been discussing taking out the hedge and putting up a fence. I even got a quote from a landscaping company on clearing out the hedge and the left side of the backyard, which is also overgrown (that’s a story for another time). The price I had gotten was almost $3,000, so needless to say I didn’t go through with that. I got a price from the neighbor’s friend for taking out just the hedge and it was a good deal so we decided to go ahead with it.

The fence that was supposed to go up “next week” turned into “next month” and then turned into “next year.” I spent all season long digging out roots of honeysuckle that kept producing more offspring and eventually got it to the point where it stopped popping up. As time went on, I would occasionally ask Mr. Friendly Loud-Talking Neighbor if he was still planning on putting up a fence. The answer was always yes, but there was the excuse of expense and other unexpected things that came up that had to be taken care of first. The last excuse was he was waiting for his tax refund. I’m guessing he’s gotten that refund by now. I told Brian that I feel like saying to the guy, “When you said you were going to put up a fence, I didn’t realize it was going to be an invisible one.” But I’m not sure how he’d take that and Mr. Friendly Loud-Talking Neighbor may turn into Mr. Mean-and-Nasty Loud-Talking Neighbor.

So I spent all season-long last year looking at the view of my tranquil garden with flowers blooming and birds chirping...with the hideous parking lot behind it. I cursed that view every day. Come the colder weather, we had wood stolen from our woodpile and my entire pile of kindling that I had gathered throughout the season was taken, as well. Now I’m concerned my vegetables will start disappearing as soon as they ripen. I find myself wishing I had that ugly, overgrown hedge back.

So that’s the story of “the fence farce” or “the invisible fence.” Here’s some before and after shots. Let’s see who you think has the better view. Here are pictures of the neighbor’s view of my garden:

Mr. Friendly Loud-Talking Neighbor's view of my garden and shed in summer
(the blue house in the background is another neighbor's house).
The neighbor's view of my garden in the summer.
The neighbor's view of the back of our shed and house in summer.
The neighbor's view of my garden and shed in spring.

Here’s the view that I have of the neighbor's property:

My view of the neighbor's driveway and garage.
Usually there's even more cars in the driveway, which is why I call it the “parking lot.”
Need I say more?

Wednesday, May 4, 2011

Bleeding Hearts

Even though my Bleeding Hearts (Dicentra Spectabilis) are losing their blooms now, I had to post some pictures of how lovely they looked a few weeks ago. They start blooming in April, maybe just after the crocuses and just before the wisteria. Their bloom-time overlaps the wisteria a bit and they compliment each other well just outside my greenhouse. Provided I keep them watered regularly, the foliage will stay green most of the season. But late in summer or fall they tend to die back, which is always a bit sad – but I know they’ll come back as beautiful as ever next year.


There are a few varieties of Dicentra, including the fringed variety, however the “old fashioned” Bleeding Heart is my favorite. There was one already planted next to my greenhouse when we moved in and I loved it so much that I planted two more. For some people, Bleeding Hearts conjure of fond memories of visits to Grandma’s house. It’s been a staple of the English-style cottage garden since the 18th century.


There’s some interesting folklore about how the Bleeding Heart got its name. I’m not sure where the origins of this story come from, but I found a blog that illustrates the story very well using pictures of the different flower parts so that it all comes together and makes sense. Check it out, it really is cool how it relates to the flower structure:
http://fourfriendsandablog.blogspot.com/2007/05/bleeding-heart-story.html