Showing posts with label recipe. Show all posts

Sunday, January 3, 2016

Brewing With Our Own Hops

This is a belated post about brewing with our own hops. I started this post in September 2015, but never quite finished it. Here it is finally done... 


Hop vines have been a part of the garden for about 4-5 years. The first ones were planted against the shed/workshop and then another vine is in the back of the kitchen garden, behind the garden bench. The rhizomes came from friends and we think that both are Cascade hops. Brian is a homebrewer, however he had never brewed with our hops before.

Every year we talk about how the hops should be tied up to grow vertically. We finally had done that this spring. The hops LOVED it and really went to town. We had a plethora of hops, at least on the vines against the shed. Brian decided this was the year to brew with them and made a wet-hopped Harvest Ale.

(Most hops used in brewing are dried, either whole cones or compressed into pellets. Wet-hopping refers to using fresh hops right off of the vines, preferably at their peak of freshness.)


Hops are sometimes grown just as ornamental vines. They start out as tendrils sprouting from the rhizomes, then grow quickly, produce lovely cones, then die back in the fall. You can cut the vines in late fall or early spring and they will sprout again in spring.

Now, don’t be thinking this will be a blog post about how to brew beer, because I’m not the homebrewer. But I can give you a general idea of what we did. This is also probably a good time to mention that I can’t actually drink beer! I have celiac disease and am on a life-long, gluten-free diet. However, Brian brews with something called Clarity Ferm, which strips out the gluten to below 20 parts per million, which is what is considered safe for those on gluten-free diets. Clarity Ferm is still controversial in celiac communities and my own nutritionist is even apprehensive about it, but I have had no issues drinking small amounts of gluten-reduced beer from time to time.

The first thing that Brian does when brewing is a yeast starter. There is a magnet inside the liquid and it spins around stirring the liquid. Those bits are yeast particles spinning around.


My part in the brewing process was to gather the hops. That required getting out the ladder and plucking off hop cones. (I promised myself I would never have photos of me on this blog, but Brian took some photos that I am in, so I am doing my best to crop myself out!)


Some of the hop cones were small and some were pretty large.


The next thing that I did was to weigh the hops. Brian wanted about one pound of hop cones, and we ended up with a little less than thirteen ounces.


Brian is showing the interior of a hop cone here.


My final contribution to the brewing process was to stuff the hops into two mesh bags, about 6 oz. each.


Brian brews in the shed (well, we often call it a shed, but it is more like a workshop with a loft). He keeps the door open while brewing for ventilation. This photo shows his brewing rig.


The recipe and some of Brian’s mad-scientist brewing stuff.


 At the end of the brewing process, Brian added the mesh bags of hops to the boil.


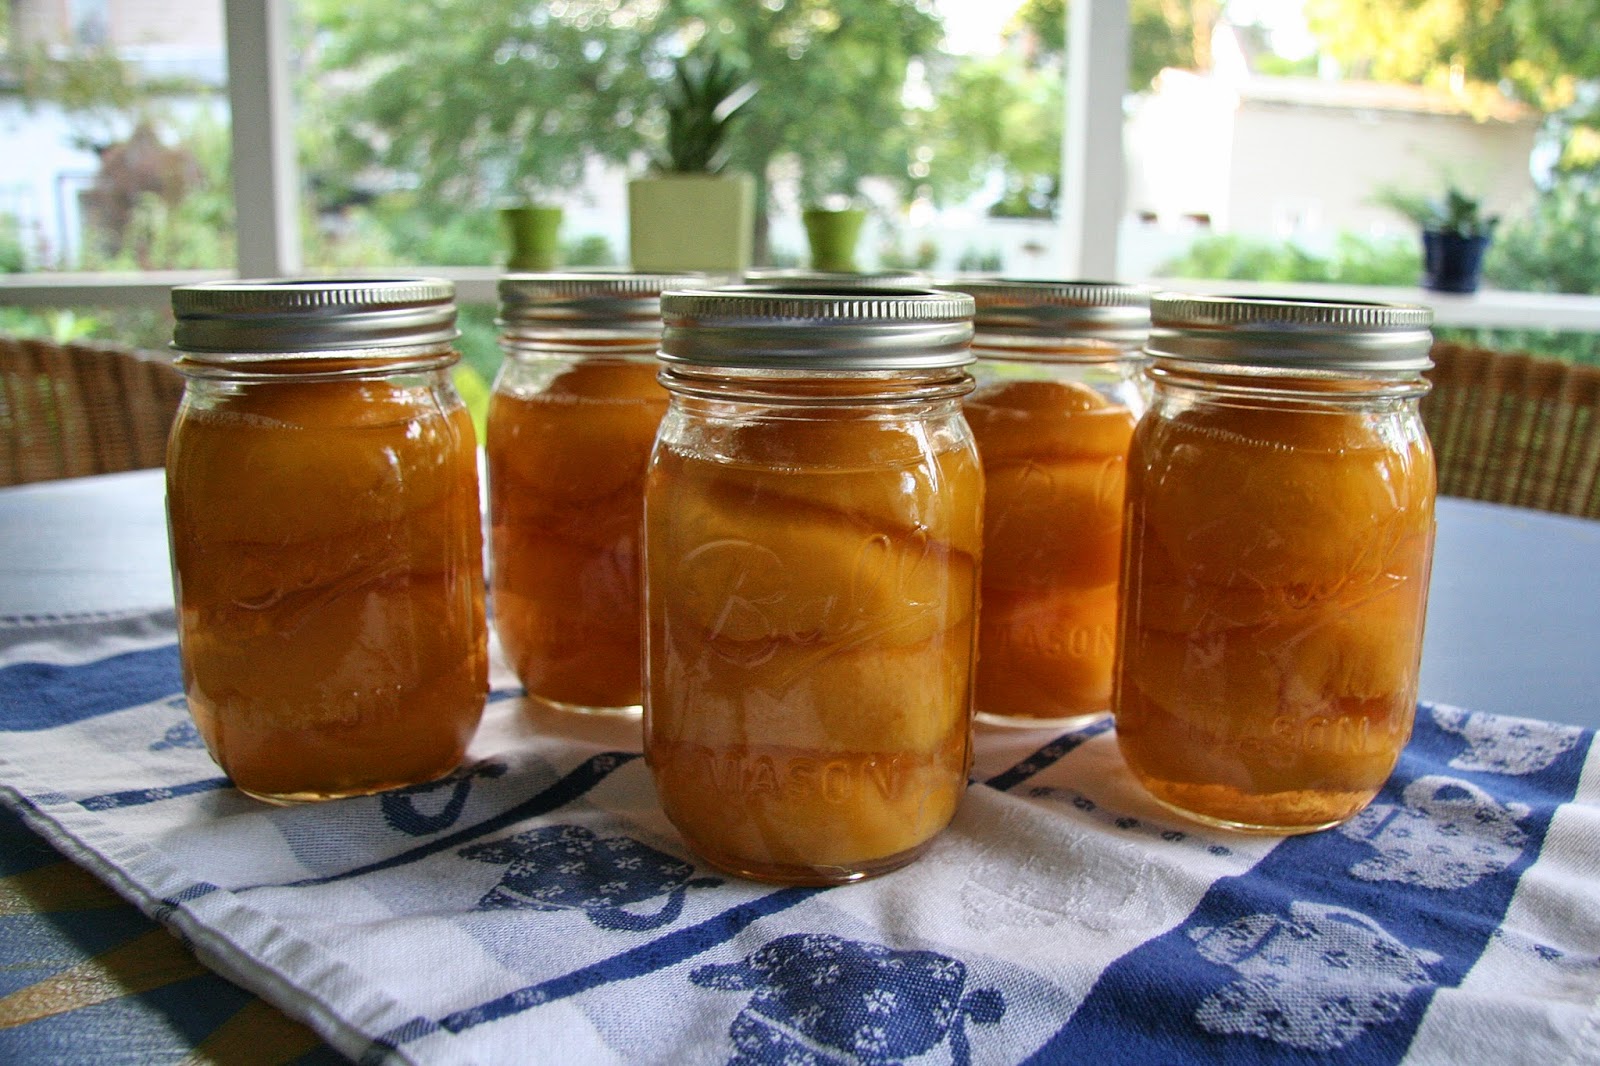
The thing about brewing beer is you can’t drink it right away. It has to ferment. The Harvest Ale fermented about 4 weeks. I can honestly say, the finished product is delicious. An excellent beer. And it tastes even better if you’re drinking it in the garden!


Brian is talking about doing a dry-hopped beer with our hops next year. Something to look forward to!

This is the recipe that Brian used for the wet-hopped Harvest Ale:

Wet Hop Ale 2015 
8-B American Pale Ale (BJCP 2015 Guidelines)

Size: 5.25 gal
Efficiency: 73.5%
Attenuation: 80%
Calories: 221.92 kcal per 16.0 fl oz

Original Gravity: 12.49°P / 1.050
Terminal Gravity: 2.58°P / 1.010
Color: 11.63 SRM
Alcohol: 5.29% ABV
Bitterness: 47.3 (Tinseth)

INGREDIENTS
82.5% Pale Ale (8.7 lb)**
9.5% Rye Malt (1 lb)**
6.8% Vienna Malt (11.5 oz.)**
2 oz Roasted Barley (added @ vorlauf for color only)
.5 oz Centennial (9.3%) @ 60m
.5 oz Chinook (13.1%) @ 60 m
1 tsp Wyeast Nutrient @ 10 m
1 ea Whirlfloc Tablets (Irish moss) @ 10 m
1 ea Servomyces @ 10 m
6.25 oz Cascade WET HOPS (1%) @ 5 m
6.25 oz Cascade WET HOPS (1%) @ 0 m (flameout)

Clarity-Ferm (10ml) - added dry to primary fermenter
White Labs WLP007 Dry English Ale

Single-infusion mash @ 149ºF

MASH WATER TARGETS
Ca 120 ppm
Mg 3 ppm
Na 8 ppm
SO4 239.2 ppm
Cl 52 ppm
HCO3 19 ppm
SO4/Cl Ratio 5.6
Target Mash pH: 5.4

FERMENTATION PROTOCOL
2L starter / target 185 billion cells
202g DME

Pitch: 65ºF (probe ON fermenter)
Day 5: 75ºF (probe OFF fermenter)
Day 10: 40ºF
Day 12+: fine w/ gelatin (beer must be < 50ºF)
Day 16+: rack

** The amounts in parenthesis are the amounts Brian used, based on his mashtun efficiency (73.5). He says that you can use the percentages and OG to scale the recipe to your specific brewing system.


Saturday, January 17, 2015

Learning More Uses of a Favorite Plant: Pineapple Sage

I was looking through the photos of my garden from November (which I have yet to post on my blog) and came across my Pineapple Sage. It is a fav or mine because it provides a bright red pop to my drab fall garden.


I have to admit, when I first planted it, I had no idea that it was a perennial and would come back every year. What a happy surprise that was. I have had it for at least five years now and it is incredibly reliable and has yet to show any signs of pests or disease. Growing this plant couldn’t be easier: it is incredibly care-free. I do absolutely nothing to it except to cut it back in the early spring. It is about 4-5 feet tall and full of foliage and blooms every year. In some ways I wish it would bloom earlier so that the hummingbirds could enjoy it, but then it wouldn’t liven up my drab, late fall garden like it does now.

When you rub the leaves of the Pineapple Sage, it smells exactly as you think it would: like pineapple mixed with sage. I have to be honest, I have never used any because I was not exactly sure what it would go with. I decided to do some online searching. I found some interesting information and recipes on Backyard Patch Herbal Blog. The blogger mentions using stems in summer drinks. Now that sounds like a great idea! She also mentions using chopped leaves in salsa and in chicken dishes. A mango (or pineapple) and avocado salsa with Pineapple Sage leaves might be nice, now that I think of it. She has recipes on her blog for Pineapple Sage Smoothies, Pineapple Sage Pound Cake, and Pineapple Sage and Ginger Chicken. I will have to try me some of those. There are also several ideas on Pinterest. Adding Pineapple Sage to some of Babble website’s detox waters would be good, I would think. The Adventures in Making blog has this awesome-sounding drink recipe: Blackberry + Pineapple Sage Soda. I should’ve done my research earlier so I could’ve enjoyed some of those great-sounding recipes before the frost killed my plant! Alas, I will have to wait until next year to try them. Better make myself a note so that I don’t forget.


Saturday, September 13, 2014

Recipe from the Garden: Tomato, Onion, and Mozzarella Salad

I can’t take credit for this recipe. It is something Brian came up with based on his memory of what his friend’s dad used to make when he was young. It is a great way to use tomatoes from the garden. And as usual, there is cheese involved...however, the cheese wouldn’t have to be included.


Tomato, Onion, and Mozzarella Salad


Ingredients:
• chopped tomatoes
• red onions, cut into strips and then in half
• mozzarella balls
• red wine vinegar
• olive oil
• salt
• fresh ground pepper
• optional: chopped fresh basil

Recipe:
I don’t have any exact measurements, this is all done to taste. Mix all of the ingredients except for the mozzarella. Let sit at room temperature or in the fridge for at least a half hour. I like to do it longer, more like an hour or two for the flavors to combine better. Then mix in the mozzarella balls just before serving. You can add fresh chopped basil, too.

I honestly wasn’t sure I would like this salad when Brian first told me about it. I thought I would find it too vinegary or too acidic, but I really like it as long as it is not drowning in vinegar. We sometimes have this with one of the only meals we ever eat together (since we have such opposite taste in food), which is our “baker” meal: baked potato with corn on the cob and some sort of salad.


Recipe from the Garden: Cheese and Herb Stuffed Mini Sweet Peppers

I have mentioned before that I am a bit of a cheese freak. I am always looking for ways to add cheese to my meal. And I am always looking for ways to add fresh herbs, too. That’s where my Cheese and Herb Stuffed Mini Sweet Peppers comes into the picture. This recipe is similar to my Hot Peppers Stuffed with Goat Cheese and Herbs recipe I posted in August of last year.

I had plenty of fresh herbs in the garden and I had cream cheese, ricotta, and goat cheese in the fridge, so I did little experiment. Two peppers are stuffed with cream cheese, two with ricotta, and two with goat. I added salt and fresh ground pepper, along with the fresh, chopped herbs – I just used whatever I had in the garden: Sweet Basil, Oregano, Rosemary, Thyme, Chive, Garlic Chives, and Parsley. I had broiled the sweet peppers for a few minutes per side just to soften them up and give them a bit of a roasted flavor.


I like the mini peppers because you can grill them, roast them, broil them, chop them up plain in a salad, or stuff them like this for a little, tasty bite. I’ve been growing Tweety Sweet Peppers this year, however, I haven’t gotten that many. These came from a farm market.


Friday, August 1, 2014

Recipe from the Garden: Tomato Salad with Corn-Tarragon Vinaigrette

Tonight’s dinner consisted of Hunter’s corn on the cob, a baked potato, and this yummy Tomato Salad with Corn-Tarragon Vinaigrette – a recipe I had gotten from my mom (she got it from the Philadelphia Inquirer newspaper). Some garden ingredients include tarragon, arugula, and tomatoes. I used my Sunchocola cherry-sized tomatoes.


Tomato Salad with Corn-Tarragon Vinaigrette


For the Vinaigrette:
1 ear fresh corn, shucked
3 T. Champagne vinegar
1/8 c. minced red onion
1 T. minced fresh tarragon
1 t. honey or to taste
3/4 c. extra virgin olive oil
Sea salt & cracked pepper

For the Salad:
3-4 lbs. tomatoes, mixed colors, types (grape, cherry, heirloom), whole if small, sliced if large
12-16 oz. arugula, rinsed and drained
Cubed fresh mozzarella and/or avocado (optional) (I used mozzarella balls)
Fresh basil leaves (this is my mom’s addition)

1. For the vinaigrette: Cut a thin slice from the thick end of the cob for a flat base. Stand the cob on that end in a shallow bowl. With a sharp knife, cut corn off the cob. Reserve.

2. In a bowl, whisk together the vinegar, onion, tarragon, honey, salt and pepper to taste. Blend well. Stir in the reserved corn. Adjust seasoning, adding extra honey, if desired. If not using at once, cover and refrigerate. Whisk or shake the dressing vigorously just before serving.

3. For the salad: In a large, shallow bowl, combing the tomatoes, arugula, and mozzarella and/or avocado. Toss gently and dress with the vinaigrette.

(My notes: I don’t like soggy salads, so I add the dressing at the last minute and don’t use a ton of it. Also, I cut the avocado at the last minute so it stays fresh.)


This salad is what turned me onto arugula and basil together. I absolutely LOVE that combination of flavors. I also love the sweet, fresh, un-cooked corn in this recipe. I had never eaten raw corn before and it turns out it is a great salad ingredient. The dressing is mild, but tasty, and lets the flavor of the other fresh ingredients stand out.

I make this meal, or a similar one, for myself and Brian about once a week or once every other week in the summer. Sometimes instead of the salad with greens we do a caprese salad.

P.S. In case you haven’t noticed, I love cheese. I think cheese shows up in just about every recipe that I have put on here. I am a cheese freak, a cheese-aholic, life just wouldn’t be worth living without cheese. It’s a wonder I don’t have a cheese blog. But Madame Fromage already does a fabulous job of that.


Friday, July 25, 2014

More Canning Fun: Boozy Canned Peaches

July seems to be canning month for me. I’m hooked now. I had planned to do my canned peaches last weekend, when I had also planned to do the dill pickles – but ended up not having time for either. In my previous post, I mentioned doing the dill pickles. Tuesday I did the canned peaches because it was obvious they were ripe and I didn’t want them to go bad. Yet again, I used a recipe from Marisa McClellan’s book “Food In Jars.” The recipe is called “Boozy Canned Peaches.” The ingredients are yellow peaches (obviously), water, sugar, and bourbon. I bought bourbon that wasn’t the cheapest, but also wasn’t the most expensive. I can’t wait to try these.


The only thing about Marisa’s book is that I can’t seem to find any information about how long to wait before you can open your canned goodies. Googling around, it is my best guess that these will be ready in a week or two...????

For more of Marisa’s recipes, check out her website.

P.S. No, I don’t actually grow peaches. I used “Jersey Fresh” yellow peaches from my favorite local farm market, Hunter’s


Monday, July 21, 2014

Making Pickles Makes Monday Fun

I had meant to make dill pickles this weekend, but my weekend project mentioned in my previous post took up more time than I thought it would. I had picked some Sugar Crunch Cucumbers from the garden and wanted to get them pickled ASAP, so I did it tonight. Sugar Crunch are supposed to be good both raw and pickled, so we shall see how they turn out.


This was my first venture into canning using a boiling water bath. I have only done what I guess you call refrigerator pickling before. (I posted about making pickled curry eggs and pickled radishes on the Fourth of July.) I was a little nervous, but all seems to have gone well. I borrowed my mom’s big canning kettle. I found the best way to get this huge kettle of water to a boil was to put it over two burners.


I followed Marisa McClellan’s Classic Dill Pickles recipe from her book “Food in Jars.” I hope it turns out alright because it indicates it should make four pints of pickles and mine only made three.


Last year I did a post about a one-day workshop I took on canning with Marisa. We had made strawberry vanilla jam, which turned out great. She has some recipes on her Food In Jars website and she also has a new book called “Preserving by the Pint.

Now that I have seemingly successfully tackled the boiling canning process, there’s no holding me back!


Saturday, July 19, 2014

Recipe from the Garden: Tomatoes Stuffed with Corn and Black Beans

This tomatoes stuffed with corn and black beans recipe is from Martha Stewart. It’s a great recipe to do now since both corn on the cob and tomatoes are in season. Plus, I love black beans. It also has jalapeno, cheddar cheese, scallions, and bread crumbs (I used gluten-free bread crumbs since I have celiac disease). (As I have mentioned before, I don’t have the space to grow corn on the cob, so I always get it from Hunter’s Farm Market. They have THE BEST corn.)


It says it takes under 30 minutes, but it seemed to take me longer. Maybe that’s because I was worn out from a day of yard work. I have another little “project” I’m working on...as usual.

Because I worked so hard, I thought I would reward myself with a mojito. Got plenty of mint in the garden for it. I posted my favorite mojito recipe a couple of years ago.


Tomorrow will be another day of working in the garden. It is nice actually having a free weekend to get stuff done.

Thursday, July 17, 2014

Recipe from the Garden: Salad with Cheese-Smothered Yellow Squash

Last night I posted about coming home from yoga class and finding goodies in the garden. Here is what I did with some of those goodies: I made up this salad.


My salad consisted of Merlot Lettuce (purple lettuce), Caesar’s Favorite Lettuce (Romaine style), Sorrel, Sunchocola Tomatoes quartered, Sugar Crunch Cucumbers sliced thin, Cherry Belle Radish seed pods (YUM!), Red Rubin Basil, Curly-leafed Parsley, some of the pickled radishes that I made a couple of weeks ago, and Yellow Squash that I quick pan-fried with a mix of cheeses on top (I used some from a bag of parmesan, romano, provolone, mozzarella). I topped it with a little extra virgin olive oil and balsamic vinegar. When I do fresh garden salads like this, I only like a little bit of dressing so it doesn’t distract from the fresh garden flavors. It was quite delicious. Actually, the pan-fried Yellow Squash with cheese alone is pretty awesome, but I also liked the addition of the greens. I think the pickled radishes are actually better on their own, though. Very tasty, but didn’t play as well with the rest of the ingredients.


Friday, July 4, 2014

Recipe from the Garden: Patriotic Pickling with Radishes (oh, and curry pickled eggs, too)

It was a rainy start to this July 4th. Seemed like a good day to pickle some stuff. Radishes are in season and I found an easy-looking and quick recipe for pickled radishes, so that seemed like a good idea. Plus, they are red and white, so when you put them in a blue bowl, they are very patriotic.


The recipe I used is from eatboutique.com. I can’t wait to try them. Have to wait a bit, though, to let them actually “pickle.” The garlic and peppercorns should add an interesting flavor.


When Brian and I were in Michigan in June, I ate my first pickled egg. It was love at first bite. We found another place that had curry pickled eggs, beet pickled eggs, and garlic pickled eggs. All were delicious, but I especially loved the curry pickled egg and decided that was the first pickled egg we should make. So even though you can’t grow eggs in the garden, I thought I would include the curry pickled egg recipe from simplyrecipes.com. There are a few other pickled egg recipes there that sound good, too.

Pickled eggs kinda look like brains or some sort of thing you would find on an evil scientist’s laboratory shelf, but don’t be afraid, they are DELICIOUS. This curry pickled egg recipe has cardamon pods, mustard seeds and onions. YUM, can’t wait until they are ready!


Happy patriotic pickling!


Saturday, August 24, 2013

Recipe from the Garden: Basil Citrus Cooler

Basil Citrus Cooler is a recipe from Martha Stewart’s website. I was intrigued with the idea of basil in a drink and I have PLENTY of sweet basil in the garden. Here is a link to the recipe. I suggest letting it sit for an hour or so in the fridge so that the basil flavor has a chance to develop.

Basil Citrus Cooler, with some white rum added.

This was very refreshing, however, after a long day working in the garden and after squeezing all of those oranges by hand, I felt like I needed an ADULT beverage (or as they say in my favorite old British comedy, Black Adder, something a wee bit more “medicinal”), so I added a wee bit of white rum. In hindsight, I could’ve used Tequila and it might have been a bit margarita-like. I only had six oranges, so I didn’t make as much as the recipe called for. If I feel up to squeezing all of those oranges again, I might try adding club soda instead of water. If you like orange juice and basil, you’ll like this drink. It won’t replace my favorite Mojito, though!

Thursday, August 15, 2013

Recipe from the Garden: Tomatoes, Blue Cheese and Herbs

Can you tell I love cheese? I don’t think I can go a single day without some sort of cheese. For some girls their weakness is chocolate, for me it’s cheese. Put any kind of cheese in front of me and I’ll eat it. I used to HATE blue cheese. Really hated it. Then all of a sudden one day I liked it. Now I love putting it in salads. I’m especially fond of this buttermilk blue cheese that I can get at Wegmans. That’s what I use in this recipe.

Tomatoes, Blue Cheese, and Fresh Herbs.

This started out as a recipe from my “Grow” magazine, originally from “Fine Cooking” magazine, but I didn’t have all of the ingredients so it’s a simplified version. For the full version go to the recipe on “Fine Cooking.” Here is my simple version:

Tomatoes, Blue Cheese and Herbs


Ingredients
• Tomatoes
• Blue Cheese crumbles (or Gorgonzola)
• Balsamic Vinegar (I have found it is worth it to splurge for the good kind)
• Extra Virgin Olive Oil
• Chopped fresh herbs (I use Parsley and Chives, as well as a bit of Garlic Chives)
• Salt and Pepper to taste

Directions
Slice the tomatoes and sprinkle with salt and pepper. Drizzle a little balsamic and extra virgin olive oil. Instead of chopping my herbs, I have found they bruise less if I use scissors to cut them up right on top of the tomatoes. Then top with the crumbled blue cheese.

The tang of the blue cheese is pretty awesome with fresh tomatoes and also goes well with the balsamic. I am sad to say that I have yet to get ANY tomatoes from my garden this year, other than a few grape-sized ones. I have heard other people in my area say the same thing. Too much rain – the tomatoes just aren’t ripening. These tomatoes came from my favorite family-owned farm stand, Hunter’s, which I have mentioned before since they have the world’s best corn on the cob. Luckily I have PLENTY of fresh herbs in the garden to top this off. This is a nice alternative to Caprese salad, which is something else I have blogged about and eat often.


Saturday, August 10, 2013

Recipe from the Garden: Zucchini Tart with Lemon Thyme and Goat Cheese

Yep, sorry, yet another recipe. But hey, the fun part of vegetable gardening is eating what you grow! I promise to post garden pictures soon.

I got this recipe from “Grow” magazine, which is a supplement that “Fine Gardening” magazine (BEST garden magazine ever!) puts out every so often about vegetable gardening. The recipe actually originally comes from “Fine Cooking.”  Check out the recipe. If you have lemon thyme, or even just plain thyme, and zucchini, that’s the bulk of the recipe. The goat cheese is added goodness. You can never go wrong with goat cheese in my book.

Zucchini Tart with Lemon Thyme and Goat Cheese.

I only had half of the amount of goat cheese that I needed, so I halved the recipe. Also, I have to eat gluten-free, so I used gluten-free flour to make the crust. My crust didn’t hold up all that well, so next time I plan on trying Chebe’s gluten-free pizza crust mix for the crust.

This took longer to make than I realized. If I had looked through the recipe I would’ve noticed that the dough has to refrigerate 30 minutes, then another 30 minutes after rolling it out, then it cooks for about 40 minutes. It had a good flavor, though, and I’ll definitely try this again with the gluten-free pizza crust.

Thursday, August 8, 2013

Recipe from the Garden: Cucumber-Wasabi Gazpacho

Brian spotted this recipe on a blog about cooking and eating in Maine called From Away. We had plenty of cucumbers in the garden last weekend, so we decided to give it a try. Rather than type out the recipe, I’ll just give you this link.

Cucumber-Wasabi Gazpacho.

This cold soup is very light and refreshing on a hot day. I suggest making sure it’s nice and cold before serving. The recipe calls for 1 teaspoon of wasabi paste, but I wanted a stronger flavor so I doubled that. Don’t worry, it wasn’t too spicy. I also doubled the apple cider vinegar. Brian absolutely HATES shrimp, so instead of garnishing his with the shrimp that the recipe called for, I used chopped cucumbers and scallions. This was surprisingly filling. I think it would be best as a small cup rather than a big bowl, as an accompaniment to something else. After finishing it we thought we should’ve saved some because we have a feeling the flavors would be even better the next day. Brian thinks a good garnish would be feta, but he would probably put feta on anything. It might be worth trying, though.

Sunday, August 4, 2013

Recipe from the Garden: Hot Peppers Stuffed with Goat Cheese and Herbs

Those two little hot peppers that you saw in my last post got turned into stuffed peppers tonight. They are Capsicum Annuum "Mariachi" Hot Peppers. The flavor is mildly hot, probably not even quite as hot as a jalapeno.* They start out yellow and ripen to a deep red color. They are meant to be used raw, such as in salads, or you can cook them.

I originally was going to use a recipe. I saw something on Martha Stewart’s website that I thought I would try, but then decided against it because it used jarred peppers, the liquid that comes with it, lemons, and mint, etc. I just wasn’t diggin’ that idea. I decided to just wing it based on what herbs I had in the garden. I don’t have measurements, I just did it to taste.


Hot Peppers Stuffed with Goat Cheese and Herbs


Ingredients
• Hot Peppers
• Goat Cheese (softened)
• Chopped Scallions
• Red Pepper Flakes (optional if you want a little extra heat)
• Chopped Fresh Chives (I used Garlic Chives because I have an abundance of that in the kitchen garden right now)
• Chopped Fresh Basil
• Chopped Fresh Oregano
• Salt and Pepper to taste

Directions
Broil the hot peppers for 5-8 minutes (turn halfway through heating). Let the hot peppers cool so the cheese doesn’t melt when you go to stuff them. Mix the scallions and herbs with the goat cheese. You can add a little salt and pepper to taste. Stuff the peppers with the cheese mixture. (I used the flat end of a chopstick to help push the cheese to the bottom of the peppers.) Garnish with chopped chives or garlic chives. I suggest cutting these into smaller bits to eat, but if you like hot stuff, go ahead and pop one right in your mouth!

Makes a good little app for a summer night. I only have one plant of these hot peppers, but boy, there are a TON of little peppers forming on there. One plant is definitely enough, at least for me.

* Postscript: I just learned the hard way, the smaller the pepper the hotter it is!

Thursday, July 4, 2013

Fourth of July Salad

What better way to celebrate summer and July 4th than a salad made from ingredients fresh from the garden. Unfortunately, the tomatoes are NOT from the garden yet. Those are still coming along. But everything else is from the kitchen garden: Sorrel, romaine, gourmet leafy greens, arugula, parsley, garlic chives, turnips and cucumbers. I was hoping to still have some radishes, but the few that are left are past their prime and as hard as a rock. The only decision to make now is what salad dressing to put on that won’t take away from the freshness of the greens!

Salad fresh from the garden.

Saturday, June 8, 2013

Recipe from the Garden: Strawberry Mojito

Strawberries are in season and boy do I love strawberries. I don’t grow them in my garden, but I always try them from different farm stands in the area until I find the sweetest ones. When I was a kid we used to go to a farm where you could pick your own. We would come home with tons of strawberries. My mom would make strawberry pie, strawberry shortcake, strawberry jam, you name it, plus we’d eat them plain. One year I ate so many strawberries that I broke out in a rash from them! Yep, that’s actually true. I had a strawberry-red rash all over my belly.

Last year I posted one of my favorite drink recipes: mojitos. This year I thought I would try a strawberry mojito. I found this particularly refreshing last weekend after working in the yard all day. I feel like it had too much sugar, though. Next time I will try less sugar.

This recipe is by Jolene from www.allrecipes.com

Strawberry Mojito


Ingredients:

• white sugar, for rimming
• 2 large
limes, quartered• 1/2 bunch mint leaves• 7 strawberries, quartered
• 1 cup white sugar• 1 cup white rum• 2 cups club soda• 8 cups ice cubes

Directions:

Pour 1/4 to 1/2 inch of sugar onto a small, shallow plate. Run one of the lime quarters around the rim of each cocktail glass, then dip the glasses into the sugar to rim; set aside.
 

Squeeze all of the lime quarters into a sturdy glass pitcher. Toss the juiced limes into the pitcher along with the mint, strawberries, and 1 cup of sugar. Crush the fruits together with a muddler to release the juices from the strawberries and the oil from the mint leaves. Stir in the rum and club soda until the sugar has dissolved. Pour into the sugared glasses over ice cubes to serve.


A pitcher of Strawberry Mojito and Molly enjoying the strawberries.

Molly jumped in my shot just as I took the picture. I’ve heard that strawberries are an aphrodisiac, but I didn’t know that they had an effect on cats. Molly went nuts when she smelled the berries. She started rubbing up against them. I had to take them away from her for fear of her getting cat hair all over my precious strawberries!
 

Thursday, September 27, 2012

Lima Beans: Misunderstood and Underappreciated

Lima beans are one of those coveted prizes when visiting the local farm stand. It seems like you either have to be in good with the farm stand owner so you get the low down on when they’re arriving, or you have to get there at JUST the right time. And then poof, they’re gone. I think pole beans are even harder to get than the bush variety. And boy, I love them pole beans. I sometimes wonder why fresh limas are so hard to get. Maybe it’s because there’s not many in a pod and it takes a lot of plants to get a “mess of beans,” as my southern mom would say.

It’s interesting with how much I like lima beans, I have yet to try growing them in my own garden. I’ve never had luck with peas and this is the first year I tried planting green beans. They did pretty well, so maybe next year I will try some pole limas.

I really think lima beans are given a bad rap. I honestly think that most people have never had a fresh lima bean in their life and that’s why they say they hate lima beans. I’ll eat frozen limas in a pinch, and eh, they’re ok, but if you really want to know what a lima bean is SUPPOSED to taste like you have to get some fresh from the farm or garden.

If you need more enticement to eat more limas, then you should know that they are really good for you. They are a good source of fiber, folate and magnesium, and are good for your cholesterol, blood sugar, and heart.

Farm-fresh lima beans.

When it comes to preparing my limas, I prefer just doing something simple like boiling, straining, and adding some butter, salt and pepper, and maybe some herbs.

Last night I added some freshly steamed corn on the cob, cutting off the kernels and mixing them in with the limas and herbs. It was a good combination. Where do I get my corn? Ah, that’s another blog post...

Monday, September 3, 2012

Recipe from the Garden: Pasta with Vegetables and Herbs

This isn’t really a recipe to follow, it’s more about taking what you have in the garden and cooking it up with some pasta. Easy peasy and a great way to use the fresh vegetables and herbs from the garden.

This is probably a good time for me to mention that I have to eat gluten-free. After years of feeling ill and suffering from abdominal pain, nausea, weight loss, and more, I finally was diagnosed with Celiac disease. Actually, I’m the one who figured it out, not my doctor. I read an article about it, asked to be tested, and a biopsy revealed the truth — it changed my life. Eating gluten-free has been a challenge at times — more-so in the early years of diagnosis — but it has been my life since 2004 so it’s just ingrained in who I am anymore. So when I say I make pasta with vegetables and herbs from the garden, I mean gluten-free pasta. So instead of wheat pasta, we’re talking rice, corn, or quinoa pasta.

Vegetables that you will often find in my garden and in my gluten-free pasta are peas, zucchini, yellow squash, tomatoes, and/or spinach. Herbs often include fresh basil, oregano, and thyme, or sometimes sage instead. I cook the veggies in olive oil with garlic or with herb butter (see July 21st  post for herb butter recipe). Then I mix in the herbs and pasta, and sometimes add shredded or grated parmesan cheese. If I’m feeling like I need a little protein, I’ll cook up some salmon or chicken to go in it. (I should probably mention that I don’t eat red meat.) Sometimes I’ll eat it just like that and other times I’ll make or buy an Alfredo or cheese sauce of some kind.

Gluten-free pasta with salmon and some vegetables and herbs from the garden.

This is one of my quick, go-to meals. If I am too tired to follow a recipe or think of something to make, I just walk out to the Kitchen Garden, pick some vegetables and snip some herbs, and my brain thanks me for it.

Monday, August 13, 2012

Recipe from the Garden: Caprese Salad

Every year at this time of the year Brian and I practically live off of Caprese Salad. I love using the tomatoes and basil from the garden for this simple dish. We often have a baked potato and fresh, local corn on the cob to go with this salad. I think it’s the healthiest meal I can get him to eat! The key to this dish is high quality ingredients.

Caprese Salad


Ingredients
• sliced tomatoes
• sliced fresh mozzarella
• fresh basil, either chopped or cut into pieces with scissors ( I prefer using scissors because they don’t “bruise” the basil as much as chopping sometimes does.)
• really good extra virgin olive oil
• really good balsamic vinegar (optional)
• salt and freshly ground pepper to taste

Directions
• Sprinkle salt and pepper on the sliced tomatoes.
• Pour a little bit of the extra virgin olive oil and a tad of the balsamic vinegar on each slice.
• Add the chopped basil.
• Top each tomato slice with a slice of mozzarella.

Caprese Salad.