Saturday, July 28, 2012

Oppressive!

That was the word at the top of the screen when I checked the website of my local news channel this morning. Nothing like the word “oppressive!” to make you want to stay inside. Meteorologist Chris Sowers goes on to say, “Today will be the 28th time this year that Philadelphia has hit 90 degrees or higher, including 21 during the month of July!” Yeh, dude, no need to tell me, I know all about it. And so does my garden.

Despite the “oppressive” heat, I have still been enjoying the bounty from my vegetable garden. Squash, tomatoes, and what I think is the last of the green beans.

Yellow squash, Early Girl tomatoes, and Kentucky Blue green beans.

Friday, July 27, 2012

Will They Survive?

This has been one HOT, dry July. The weather folks call for a chance of thunderstorms nearly every day, but we hardly ever seem to get rain. Last night we had gusty thunderstorms and I couldn’t help myself from going outside on the back porch to enjoy the sound and smell of the long-awaited summer rain. I could almost hear my garden saying “thank you!!!” to mother nature.

I have several plants that I am worried about during these endless heatwaves we’ve been having. Here are a few. Be warned, these pictures aren’t for the faint of heart. These plants are suffering big-time. And no matter how much I try to water them on my own, it just isn’t enough.

This, my friends, if my beloved Smokebush. I was so excited when I planted this beautiful specimen last year in the back of the flower garden. It looked so content there...until the past couple of weeks. Whole sections of it are drying out and crumbling. I know it doesn’t help that it’s in the back of the garden and hard to reach with the sprinkler or the hose. I have tried to pay special attention to it. But alas, my love is not enough. Will it survive? Only time will tell. 

Sufferin' Smokebush

By comparison, this is what it looked like just a few months ago in May...

Healthy Smokebush.

You see why I’m worried?

My daisies are usually very happy-go-lucky flowers that last awhile in the early summer. Not so much this year. The heat got to be too much for them and they now look quite sad. Will they survive? Yes, I am certain they will. They are one of the first things I planted in my garden and year after year they never let me down, my faithful friends.

Sad daisies.

Do you even recognize what this plant is? It’s a hydrangea. The past two years my hydrangeas have gotten literally KILLED in July and end up looking like this. Last July was hot, too, so is it the heat? Or is it a disease? I have four hydrangeas in my flower garden that all have looked like this by the time July rolls around for the past two years. Will they survive? Well, I thought I lost them last year and they came back. They were beautiful in the spring. So yeh, I think they’ll survive, but I’m beginning to wonder if there’s something wrong with them.

Guess what this is?
Another hydrangea, but not quite as bad as the first.

These are the hardships we face as gardeners every year. I dearly love ALL my plants and to lose any is always heartbreaking. Will they make it? I hope so, I really hope so.

Recipe from the Garden: Scallop and Spinach Salad with Gorgonzola

I made this recipe up one night when I saw fresh, local scallops at the store. I didn’t have a recipe in mind until I got home and took a look at what I had in the fridge and what was growing in the vegetable garden. This has become one of my favorite easy recipes.


Scallop and Spinach Salad with Gorgonzola


Scallop and Spinach Salad with Gorgonzola


Ingredients
• large sea scallops
• pancetta or proscuitto (slices or pieces)
• crumbled gorgonzola
• baby spinach
• good balsamic vinegar
• olive oil
• herb butter (See previous post for herb butter recipe. If you don’t have herb butter, you can add some chopped fresh herbs or some dry herbs to some butter when you put the butter in the pan.)

Directions
• Melt some olive oil and herb butter in a non-stick skillet with the heat turned up to medium/high.
• Cook scallops about 3 minutes per side, depending on how thick they are and how well done you like them. Let them form a crisp surface on the outside of the scallop.
• Towards the end of cooking, add in pancetta or proscuitto and cook until crisp. (Or you can cook the pancetta or proscuitto first and set aside on a paper towel to drain and cook the scallops in the same pan.)
• Dab the scallops and pancetta or proscuitto with a paper towel. Put them on top of a bed of spinach and gorgonzola.
• Drizzle with good balsamic vinegar.

Saturday, July 21, 2012

Recipe from the Garden: Herb Butter

Herb butter is so easy, so good, and so versatile. I love it on everything from baked potatoes, to pasta, to corn on the cob. When I make herb butter I use whatever fresh herbs or dry herbs I have on hand. Right now I have two different ones in my fridge: Parisien Herb Butter and Sage Herb Butter. The Parisien Herb Butter uses Penzeys Spices Parisien Bonnes Herbes Blend (http://www.penzeys.com) and the Sage Butter uses fresh sage from my garden.

Parisian Herb Butter and Sage Herb Butter.

I don’t really measure, I just mix some chopped herbs and butter. But if you’re looking more for a “recipe,” here you go...


Herb Butter


Ingredients
• 1/2 cup of softened butter or margarine
• 1 tsp. each of fresh herbs, such as thyme, basil, parsley and/or sage*

Directions
• Mix together in a small bowl. Store in refrigerator until ready to use. Either roll up in wax paper or put it in a small plastic container. I find it’s easier to use if it’s kept in a small plastic container.

*Here are a few herb blends worth trying:
Fine Herbs: Parsley, French Tarragon, Chives, Chervil
Italian Blend: Oregano, Basil, Rosemary, Parsley
Herbes de Provence: Thyme, Basil, Oregano or Marjoram, and Sage or Rosemary
Garlic and Chive: Garlic and Chives, of course!


Zone Change

Earlier this year the United States Department of Agriculture released an updated Plant Hardiness Zone Map. The previous map was made in 1990. The new map is based on 30 years of collected data (from the years 1976-2005), a longer time period than what was used before. If you take a look at the new map, you might find you are now in a different hardiness zone. I used to be 6B, but am now 7A. What does this mean? Well, it means the Average Annual Extreme Minimum Temperature in my area is 0-5 degrees Fahrenheit. Slightly different than before. It used to be -5-0 degrees Fahrenheit. Does this mean there are certain plants I used to be able to grow that I can’t grow anymore? I’m not so sure about that. Hardiness zones aren’t the end all be all of a successful garden. After all, it is what it says it is, an “average” of the annual extreme minimum temps There are times when you can get a plant to survive in a slightly different zone by giving it some winter protection. I’m certainly not going to pull out plants that no longer fit within my zone that have thrived in my garden for years.

Will this new information change the way I garden? Probably not. But it’s always good to know what your hardiness zone is. For more information and to find your own Plant Hardiness Zone, check out their website: http://planthardiness.ars.usda.gov

Monday, July 16, 2012

Front Porch Plants

I started gardening not long after I graduated college. For those first few years, I rented an apartment. Then Brian and I rented a house for six years. So during that time I gardened at my mom’s house and I had tons of container plants. My old apartment had a small, glassed in back porch that I used for my plants. At our rental house, the front porch was covered in containers. I still love gardening in containers. On the front porch, I like to color coordinate my plants with the colors of the house. Here’s my porch plants this year.  I took this standing in the corner on the porch.

Front porch plants.

The first thing most people notice when they walk by is the Endless Summer (blue) Hydrangea and the hanging baskets of Dragon Wing Begonia. You can see my white metal fern stand on the porch, too.

Hydrangea and Dragon Wing Begonia.

The next thing you notice are the containers on the steps. The bottom two contain various annuals like Celosia, Begonia Bonfire, miniature Dahlias and more. The large container on the top step is one I made in a tropical plants class I took at Longwood Gardens. We got so many amazing plants in that class. This container has Canna Tropicanna (the big leafed thing in the middle of the pot), Aeonium (the tall, dark purple plants), and Kalanchoe Thrysiflora (oval, silvery foliage). There also was some flowering annuals in there that didn’t survive the latest heatwave.

Three containers on the front steps.

I have a large pot to the left of the front door that has a stand in it. Then I have some smaller pots to the left and right of it. You’ll probably notice Coleus, Variegated Ivy, lime-colored Sweet Potato Vine, and more Dragon Wing Begonias.

Fun with containers.

Here’s a close-up of the tropical plant in the top basket part. I need to look for the tag because I can’t remember the name of this. I bought it at Waterloo Gardens in Exton. I love the dark red undersides of the leaves.

A two-toned tropical plant.

To the right of the front door are more containers. I must admit, I’m loving the colors and textures I have in this grouping this year.

More containers to right of front door.

I bought these three plants at The Perennial Garden (which I think is in Mount Holly) in the early spring. What we have here is Burgundy Threadleaf Alternanthera, Begonia Rex Fireworks, and Little Rubby Alternanthera. I absolutely love this combination together, however, I think it’s in need of a bigger pot.

Playing with colors and textures.

This is another type of Begonia. Some of these Begonias are really cool and they keep well in my greenhouse through the winter.

Some type of magenta, green and silver Begonia. Gorgeous!

This is an amazingly cool Aloe. When I took that tropical container class at Longwood Gardens, they let us pick out what we wanted from the leftover plants we didn’t use in our container. I picked up this bad-boy right away before anyone else could grab it. It was crammed into a container that was much too small for it. It seems really happy in the larger pot. It probably could use more sun then it gets here, however, it seems to be doing just fine. I must say, I tore up my hands repotting this guy — those spikes look cool, but they are pretty nasty.

A large, spike-filled Aloe.

When I’m watering the plants or doing work in the very small front yard that we have, I sometimes take a break on the porch swing or the rocking chairs. The porch plants help to make for a peaceful like oasis.

Dragon Wing Begonia and ferns.

Saturday, July 7, 2012

Butterflies and Bees

I feel like it has been a very prolific year for bees and butterflies. I’ve especially seen a lot of those little white butterflies flitting about the garden, mainly around the Catmint. I think they’re called Cabbage butterflies. I also feel like the lightening bugs have been particularly abundant this year.

I will sometimes get monarchs, but really the kind of butterflies I see the most (other than the small white ones) are tiger swallowtails. They don’t call it Butterfly Bush for nothin’.

Tiger Swallowtail butterfly on the white butterfly bush.


Tiger Swallowtail again.

Another one, this time on the purple butterfly bush.

Tiger Swallowtail on the purple butterfly bush.

Here is the under-side of a Tiger Swallowtail.

Tiger Swallowtail again.

Bees, bees everywhere. Very busy, those busy bees. I mostly see those larger black and yellow bumble bees, however, I do occasionally see the smaller honey bees. They love the Monarda, the Germander, and the Catmint.

Bee on the Germander.

It always makes me smile when I see Mother Nature’s creatures enjoying the garden as much as I do.

Kitchen Garden Goodies

It’s day nine or ten of our heatwave with a record high today of 103 degrees (heat index of 105-110). I feel like I’m fighting a losing battle with trying to keep the garden hydrated. Despite the heat, we’ve been enjoying goodies from the Kitchen Garden.

As mentioned in a previous post, I planted green beans for the first time this year and they seem to be doing really well. They are Kentucky Blue pole green beans.

The tomatoes are starting to ripen. I didn’t plant as many varieties this year — just two. Sungold, which are grape-sized and very sweet, and Early Girl, which are a medium red tomato.

Early Girl Tomatoes.

 I planted edamame soybeans for the first time this year and they really aren’t doing much.

Soybeans

The Picklebush cucumbers are doing well. I like these raw in salads. We are hoping to try actually pickling some this year.

Picklebush cucumbers.

Sweet Basil is my absolute favorite herb and I have to plant it every year. Nothing beats the smell and taste of fresh basil.

Sweet Basil and orange Cosmos.

We have been enjoying three varieties of greens. I like to mix them in salads.

Fresh greens and mint.

I love walking out the back door with a bowl and picking whatever is available in the garden for making a salad. Here we have a mix of greens with garlic chives, Sungold tomatoes, Picklebush cucumbers, gorgonzola cheese and hard boiled egg (the last two are not from the garden, obviously).

Fresh salad using Kitchen Garden goodies.

Unfortunately, today is not a good day to be gardening due to the heat. Think I’ll stay inside in the air conditioning with a nice, cold glass of iced tea. 


Wednesday, July 4, 2012

Recipe from the Garden: Mojito

Happy 4th of July! A beastly hot day like today deserves a refreshing beverage. This time one with a little “spirit.” As mentioned before, I have enough mint to shake a stick at. That means a lot of mint. Here’s my peppermint, along with lemon balm, chives, and germander. I call this area, and the area on the other side of the back porch steps, my Herb Garden. I also have herbs in the Kitchen Garden, too. That big pot is my mini water garden.

The herb garden.

A close-up of the peppermint and germander.

Peppermint and germander, with a bit of chives sticking out.

I absolutely love a good mojito. So it’s only fitting that I make them when I have so much mint. This recipe comes from www.allrecipes.com. It’s a great website — the recipes with five stars and lots of reviews never let me down. Like this one!


The Real Mojito

(from Brandy, www.allrecipes.com)

Ingredients
• 10 fresh mint leaves
• 1/2 lime, cut into 4 wedges
• 2 tablespoons white sugar, or to taste
• 1 cup ice cubes
• 1 1/2 fluid ounces white rum
• 1/2 cup club soda

Directions
• Place mint leaves and 1 lime wedge into a sturdy glass.
• Use a muddler to crush the mint and lime to release the mint oils and lime juice. (I use the back of a large wooden spoon as my muddler.)
• Add 2 more lime wedges and the sugar, and muddle again to release the lime juice. Do not strain the mixture.
• Fill the glass almost to the top with ice.
• Pour the rum over the ice, and fill the glass with carbonated water.
• Stir, taste, and add more sugar if desired.
• Garnish with the remaining lime wedge.

Just perfect for a hot day like today! I doubled the recipe to fill my pitcher below. Thanks to mom for this gorgeous Simon Pearce hand-blown glass pitcher.

Mojito with lime and mint.

Tuesday, July 3, 2012

Recipe from the Garden: Parmesan-Roasted Green Beans

I planted green beans for the first time ever this year. I started them from seed in the spring. Good ole Burpee Seeds, my tried and true friend, I knew they wouldn’t let me down. The vines have taken over one of my teepee shaped obelisks that Brian and I had built. I noticed the other day that there were actually beans growing in there!

Kentucky Blue Pole Green Beans.

I was practically jumping up and down in the garden, I was so excited. I immediately had to make one of my favorite recipes. I actually never really thought too much of green beans until I started making them this way. I have to give props to Tyler Florence from the Food Network for this recipe. It’s his recipe with a couple of additions of my own.

Parmesan-Roasted Green Beans

(Recipe by Tyler Florence, with a couple of changes)

Ingredients
• 1 pound thin green beans (I just use regular-sized green beans, not “thin”)
• Extra-virgin olive oil
• Kosher salt and freshly ground black pepper
• 1 cup grated Parmigiano-Reggiano (I have found that shredded does better. The grated melts too fast.)
•  Sprinkle of smoked paprika (My addition. It adds a little “pep” to this dish.)

Directions
• Preheat the oven to 400 degrees F.
• Trim off the tough end of the beans
This is my addition here: I blanch the beans in a boiling pot of water for 3-5 minutes, then drain.
• Arrange the beans on a nonstick cookie sheet.
• Drizzle with olive oil, season with salt and pepper to taste, sprinkle with a little bit of smoked paprika.
• Sprinkle the cheese evenly over the top and bake until the cheese melts and forms a crisp shell over the beans, about 10 minutes.
• Let the beans sit a few minutes for the cheese to cool slightly. Lift the beans out onto a platter and serve.

*Also give this recipe a try with asparagus. It’s just as delicious!

(Sorry about the blurry photo. Can’t wait to get my lens back from Canon — this zoom lens just isn’t meant for this!)

Parmesan-Roasted Green Beans. Yum!!!!

It’s July and It’s a Hot One

This time last year, Brian and I were headed off to Oregon for two weeks. We left just in time for a heatwave. I spent most of the time worried about my garden even though I had set some sprinklers on timers. Well, here we are in July again and it’s another heatwave. Temps in the 90s, feeling like more than that. I can practically hear my garden begging for water. I can certainly see it. The hydrangeas are always the first to let me know by showing signs of wilt. Can you see the heat radiating from these photos?

The hot sun is beating down on the Raspberry Wine Monarda, the Purple Coneflowers, the white Phlox David and the white Butterfly Bush...

The Flower Garden.

The Purple Coneflowers dance in the wind, relishing the breeze on this sweltering day.

Purple Coneflowers and Raspberry Wine Monarda behind them.

The sun ducks behind the clouds briefly and the flowers breathe a sigh of relief.

Raspberry Wine Monarda, white Phlox David, Purple Coneflowers.

But that hot sun is back again, peaking through the trees.

Blue Hydrangea, purple Geraniums (the perennial kind), Monarda and Coneflowers.

One plant that seems to shine brightly in the piercing sun is the Shasta Daisies. They look positively radiant. They look so jolly, as if they are smiling and laughing in the blazing sunlight. Daisies are one of my favorite flowers. One of my mom’s favorite, too.

Shasta Daisies.

This one isn’t in the Flower Garden, it’s in a corner by the greenhouse. I planted this pup of a hydrangea a good four or more years ago and this is the first year it has bloomed. It really has taken a long time to grow, but it seems pretty happy right now. I think it’s happy because it’s in a shady spot! It’s kind of amazing to me that I can actually remember the name of this hydrangea when I planted it so long ago: It’s Sheila. It’s a lace-cap variety.

Pink Lace Cap Hydrangea.

Well, better get out there and water so there are still plants left after this heatwave ends.

They Put the Bee in Bee Balm

Well, Monarda isn’t called Bee Balm for nothin’. The bees sure do love it. My Raspberry Wine Monarda has spread so much this year that it’s threatening to take over some Phlox David, Foxglove, and a Hydrangea. I think I’ll have to put an end to its rambling. But how could I do that to the bees???

Bees buzzing away at the Raspberry Wine Monarda.
It’s an action-shot! I think he’s spotted me. I better run for it.

Monday, July 2, 2012

Recipe from the Garden: Iced Tea

My favorite (non-alcoholic) beverage in the warm weather is a glass of freshly brewed iced tea with a lemon wedge and a sprig of mint from the garden. Luckily, I have plenty of mint to go around.

Home-brewed iced tea with a lemon wedge and sprig of peppermint.

Here’s my “recipe” for iced tea.

• Boil water (I use a 1.5L pot).
• Once water has boiled, remove from heat and put in three bags of black tea (I use decaf tea) and two bags of herbal blueberry tea.
• Let steep for an hour or so.
• Remove tea bags and pour into a pitcher (the pitcher I use is 2 quarts). Fill the rest of the pitcher with water.
• Refrigerate until ready to serve.
• When ready to serve, pour into a glass over ice, add a lemon wedge and a sprig of mint. (I mush up the mint some to release the flavor before putting it into the tea.)
• Sit on the porch and enjoy!


The Kitchen Garden in June

It’s been interesting trying to get pictures of my garden using a 55-250 zoom camera lens. As mentioned previously, many times in fact, my 17-85 has been acting up. I am finally sending it in for repair after talking to Canon about the aperture issues. It doesn’t like to take pictures at any higher an f-stop than 4.0, which means it’s not very good for my purposes lately. Please, Canon, send it back to me in tip-top shape! (And don’t charge me an arm and a leg for it. I need those for working in the garden.)

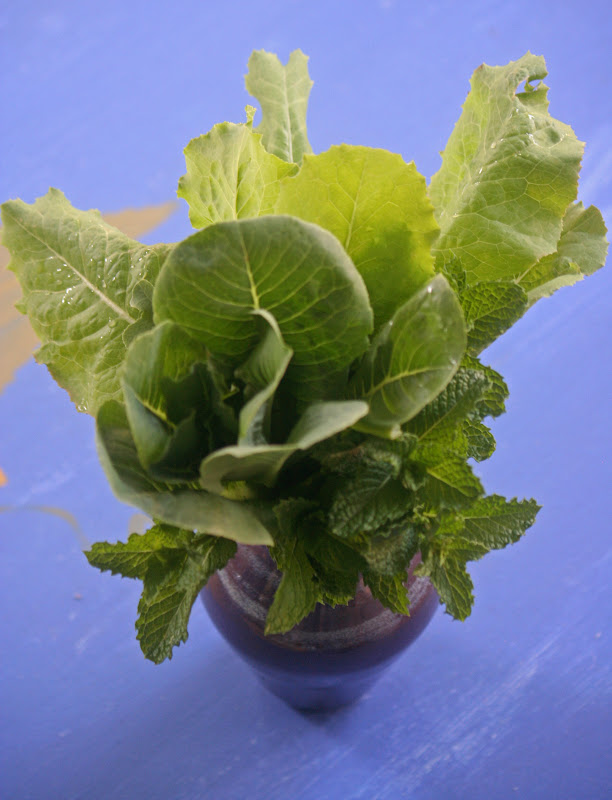
I had so many triumphs in my vegetable garden last year. This year, there’s been a few disappointments. My beets and spinach seeds didn’t germinate. Why? I’ll tell you why. I used seeds from last year and they hadn’t been properly stored. It was kind of an experiment and now I’ve learned my lesson. Also, my iceberg lettuce either didn’t germinate or looks a lot like my Buttercrunch Lettuce. I think maybe it IS Buttercrunch.

Little Ceasar and Buttercrunch, I believe.

Other greens I planted from seed: Heatwave. As you can tell by the name, these greens are supposed to do well even in the heat of the summer. This is the first year I have planted this variety. I like to mix it with the other greens in a salad. You may notice I have carrots planted here, too. I have soybeans planted in this same bed, however, they are pretty spindly looking. First time I’ve tried them.

Heatwave lettuce and carrots.

If you look at the bed on the right towards the back, you will notice it’s a little bare. That is where the beets and spinach are supposed to be. I have some zinnias and a Sungold Tomato in that bed. The bed towards the front right has cilantro, nasturtium, zinnias, an Early Girl Tomato, and Picklebush Cucumbers. (As you can tell from this picture, the neighbor behind us has STILL not finished putting up that fence — that’s their boat in the upper left of the photo. Argh!)

Kitchen Garden.

Here’s a close-up of one of the nasturtium flowers. This is variegated Alaska. They are edible — give them a try in a salad sometime. They have a kind of peppery flavor.

Nasturtium.

I picked up these orange cosmos at a local farmer’s market in the spring and I just love them. They are so cheerful. They were stunning next to the lavender when the lavender was at its peak and really purple looking. In this photo it’s a bit past peak. The yellow flowers in the background are a type of Heliopsis called Summer Nights. They have a dark, almost black, stem. It blooms constantly and has become a favorite. I planted it last year.

Orange Cosmos, Lavender, and yellow Heliopsis Summer Nights.

I love using hot colored flowers in the Kitchen Garden. The yellow Heliopsis, the orange cosmos, the yellow, orange, pink and red zinnias, and then the red/magenta colors of the Rainbow Swiss Chard — all happy colors, as Bob Ross would’ve said. The u-shaped bed also has Sweet Basil and Garlic Chives in it.

Hot colors in the Kitchen Garden.

The raised bed that is a bit on the left in this photo is the one that has the Early Girl Tomato and the Picklebush Cucumbers, as well as zinnias, nasturtium, and cilantro.

Tomatoes and cucumbers.

I absolutely adore old-fashioned Hollyhocks. Surprisingly, they are hard to find anymore. Sure, you can find those double ones, but the classic, grandmotherly, single variety seem to be more rare anymore. I planted these two years ago. Last year I thought I lost them to rust. This variety is supposed to be rust-resistant, but I really think that’s almost impossible with Hollyhocks. I did loose one to rust last year and now only have two. However, these two have been putting on a real show. Makes me want even more. However, they are getting rust again and that makes me nervous that I’ll still loose them. Time will tell. The bees and butterflies love these, and I also saw the hummingbird hanging around them.

Hollyhocks.

The first bed with the teepee looking structure (that Brian and I built last year) has radishes, Rainbow Swiss Chard, Sugar Snap Peas, Toy Pak Choi and zinnias. The Sugar Snap Peas were a disappointment — didn’t do much. The Pak Choi really has done fairly well except for the fact that some bug has been eating the leaves. Maybe slugs. I battle slugs all over the yard. Pak Choi is great in stir fries. I even like some raw in my salad. The other teepee structure in the background is covered in Kentucky Blue String Beans. They are a pole variety, obviously. I just harvested my first batch the other day and man, they were scrumptious! 

The Kitchen Garden.

If you read my blog last year then you know how much work I put into building this Kitchen Garden — from clearing out space, to leveling the ground all with just some elbow grease and a shovel, to recruiting Brian to help me build the raised cedar beds, to putting down edging and landscaping fabric, to filling the beds with compost and other good stuff, to hauling three tons of gravel from my driveway to the back of the yard. All by my lonesome (except for the cedar beds part with Brian’s help). It was a serious project. But boy, it was worth it. My only complaint is weed seeds still find a way to sprout in my gravel paths and require a lot of pulling. But otherwise, I LOVE my Kitchen Garden. Now if I could just keep the squirrels from loving it, too. They didn’t bother it last year, but this year I’m chasing them out of there all the time.

Here’s a “map” of what I have where this year in the Kitchen Garden. Click on it to enlarge.

Map of Kitchen Garden.